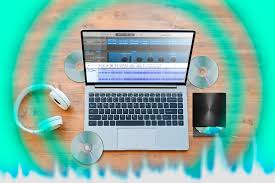
I digitize my analog music as a backup to play it on my devices and to protect my record collection from excessive wear and tear. Here’s how to do it using one of two popular free software solutions: GarageBand and Audacity.
Set up your analog audio
To digitize your analog music, you’ll need to transfer it to your computer via your computer’s built-in sound card or an external audio interface. Once your equipment is connected, open your favorite digital audio workstation (DAW) software and follow these steps:
Create a new project
Apple users will likely want to use the excellent GarageBand software included on all iOS and Mac machines—GarageBand is a wonderful DAW for beginners. So, for GarageBand, go to New Project > Empty Project.
Windows and Linux users may choose to use Audacity. Although this software feels older than GarageBand and is limited to audio instruments, it is ideally suited for digitizing analog audio. A new project will open automatically at startup.
Choose your audio input source
In GarageBand, select the audio track type for Microphone or Line Input in the popup window. Next, choose Input 1 + 2 in the dropdown menu for a stereo track.
In Audacity, select the Audio Setup button in the toolbar, hover over Recording Devices, and choose your audio input source.
Add a stereo audio track
For GarageBand, click Create in the popup window, and a stereo track will be automatically added to the Arrange window. For Audacity, right-click anywhere on the Arrange window and choose Add Stereo Track.
Record your music in the DAW
The recording process is the same whether you digitize your college notes, a single track or cassette tape, or an entire section of a record. Remember to check your levels every time you start a new project to improve your chances of getting it right the first time.
Check your recording levels
Start playing your audio. In GarageBand, if your input source is configured correctly, the meter in the upper-right panel will move according to the audio levels. Keep the volume button centered on zero and make sure the meter doesn’t “clip.”
Clipping occurs when the audio becomes distorted, and the light turns orange as the meter reaches the right side. If this happens, lower the level on your input device (record player or audio interface) until the level blinks green and yellow continuously.
For Audacity, as your audio plays, the meter in the upper-right of the window blinks from green to yellow and then red as the level increases. As your audio plays, moderate the volume of your input device until the meter blinks green and yellow continuously at minus 6 dB.
Record your audio
To record your audio in Audacity or GarageBand, click the red Record button at the top of the window and begin playing your audio. The recording will appear as two sound waves representing a stereo signal when the audio is playing. After the recording is finished, click the Stop button and save your project.
If clipping has occurred, delete the audio track, lower the input level, and begin again.
Edit your music before exporting
Before you export your audio, you must split it into individual tracks and arrange each track to remove unwanted blank space at its start and end points. You can also edit your audio to improve its quality.
Split your audio into tracks
In GarageBand, drag the cursor to the end of each song (the sound wave narrows between songs), right-click, and choose Split at Playhead.
