Whether creating reels or editing videos for YouTube, Canva is a great mobile app for putting together your smartphone footage. Today, I’ll show you my entire process for creating and editing videos using this tool. You can follow along if you have a free or paid subscription.
Using the right template or Dimensions
To successfully create anything in Canva, you need to have the right foundation. If you want to add a more artistic twist to your content, you can use templates; those of you who would prefer to start from scratch can use custom dimensions instead.
If you’re posting on a specific platform, it’s worth checking out Dimensions beforehand. Canva will help in this regard; you’ll find presets for reels, TikTok videos, and more, just use the search bar to find what you’re looking for. In this example, I’m going to use the Video (1080p) Dimensions template and start from scratch.
Adding clips to your Canva project
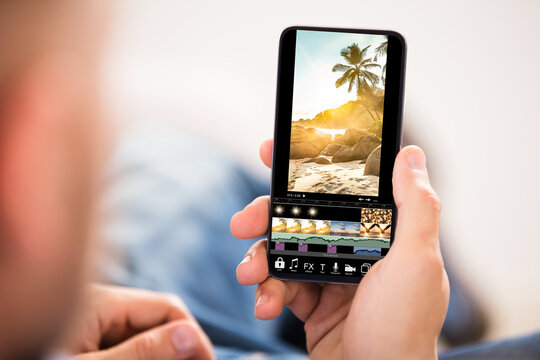
Once I choose the starting point for my video, the next step is to import the clips I plan to use. The footage I want to use is already on my smartphone, which makes this easy. However, if I want to edit clips from a DSLR through Canva for mobile, I will import them to my computer first and then open the Canva app on my smartphone.
After you import your video clips, you will see an editing timeline at the bottom. You can use Canva to edit video content, but it is also possible to create videos from pictures.
Editing the colors and content of the video
Most of my time editing in Canva is spent on the colors of the video and other parts of the content. Since this is usually quite complex, I am going to split it into two parts; first, I will edit the colors before moving on to the rest of the content.
Editing colors and lighting in My Canva video clips
Although Canva doesn’t have the advanced color editing tools found elsewhere, it does have a range of useful tools for beginners. For example, you can add filters and adjust saturation. Similarly, you can change different lighting aspects.
In addition to using Canva to edit the colors of a video, you can also change the color of images, graphic elements, and text in Canva.
Adjusting other aspects of My Canva video content
After editing the colors, I recommend moving on to changing the content in your video. For example, you can add transitions and animations. These include fades, zooms, and tumbles. In some cases, you may also benefit from using combinations.
You’ll see the different animation options divided into subsections, while transitions are all on the same line. It’s also possible to choose whether you want these changes to apply to all pages or just one, as well as adjust their intensity (you need Canva Pro to customize animations; transitions don’t require a paid plan).
Adding final steps
You’re almost ready to export your video project, but before you do, I recommend adding a few extra steps. For example, Canva lets you change the speed of the video. You can also decide whether you want your content to play automatically or repeatedly. Do this by selecting Playback and adjusting these categories as you find necessary.
Changing the sound
Before exporting your project, I suggest changing the sound in your Canva project. To be honest, I usually don’t do much here other than change the volume. You can use the slider to lower it or tap the icon to mute them all.
To add music to your content, I don’t recommend using Canva. Instead, I suggest using another method to add music to your videos on iPhone and Android.
Editing videos in Canva is incredibly simple, and you can make many simple changes like changing colors and adding filters. Even though this isn’t the best place to add music, you can easily do it elsewhere. You can use Canva to edit reels, YouTube videos, TikTok posts, and more.